...and then messed it up with cheap glowy effects.

Still, I'm happy with how it turned out, which is rare for me, especially since I don't colour my sketches that often.
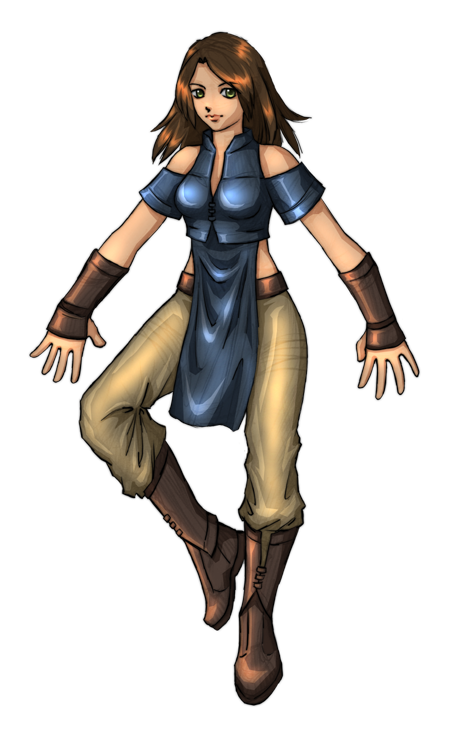
sprite form:

If I ever got around to making an RPG this would be the main character.┬

EDIT: tutorial tiem!
This tutorial assumes some familiarity with Photoshop. I used Photoshop 7.0 for this but it should be similar enough to use with later versions. I put alternate methods for people without a tablet/scanner/paper/pencil.
1. Draw your sketchDraw a sketch on paper and scan it, or draw it directly in Photoshop. I used 0.5 mechanical pencil on printer paper. After scanning at 300 dpi I resized the dimensions of the image to twice the original size so I'd have a large canvas to work with.
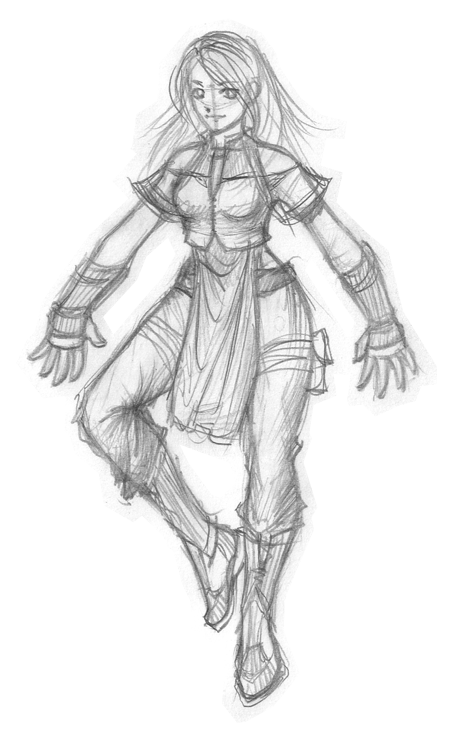
At this stage I have one layer (the sketch).
2. Preparation[/b]
There are several options at this step.
i. go over your pencil sketch with a pen and erase the pencil for a clean set of lines, then scan it.
ii. use the pen tool to draw clean lines using your sketch as a guide.
iii. use your tablet (or mouse) to draw clean lines using your sketch as a guide (what I did).
How to lift your lines off the paperDo this if you want to separate your sketch lines from the background.
Select the canvas and copy it so it's in your clipboard, then go to your channels tab, create a new channel, and paste it there:
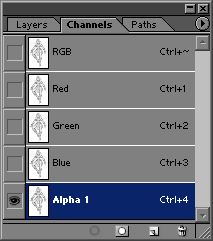
Go back to your layers tab and clear the sketch. Create a new layer, then go to Select -> Load Selection and choose these settings:
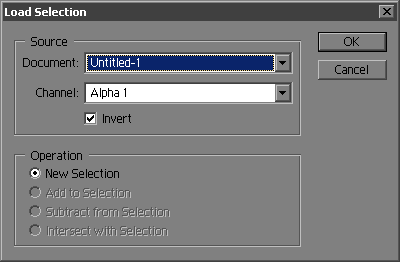
Then use the paint bucket to fill the selection with black. You should have a nice alpha-transparent sketch
 How to use the pen tool for inking
Do this if you don't have a tablet and using the mouse isn't precise enough.
Draw some paths with the pen tool:
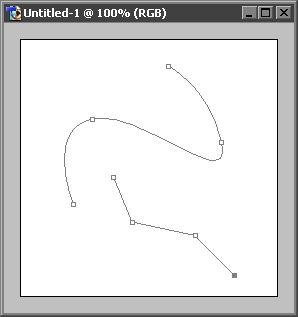
Right click and select
Stroke Path from the menu:

Result:
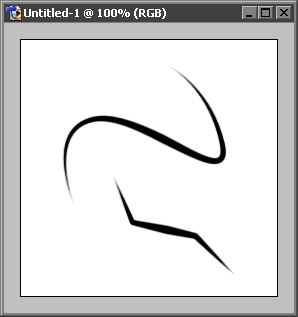
If you're using a tablet, make sure to draw your clean lines on a separate layer from your sketch. I used an 8px diameter brush, 100% opacity and flow, and the size jitter was set to pen pressure.
At this stage I have 2 layers, the (lifted) sketch and my new set of lines (the background doesn't count

).
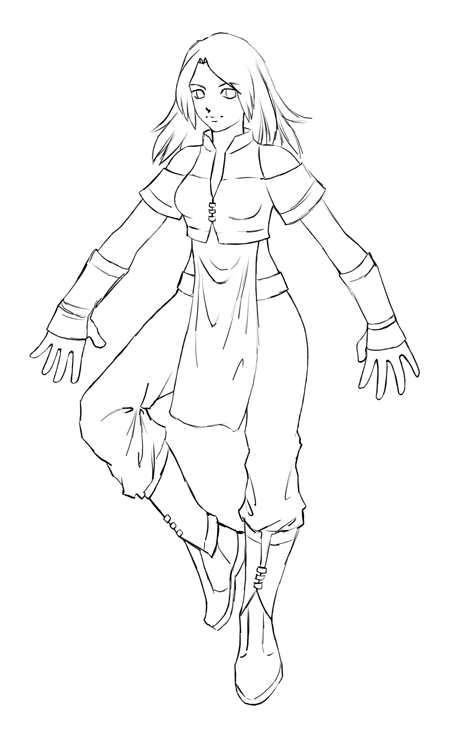 3. Colour
[/b]
Pick some colours and fill your sketch in. I put each colour on its own layer.
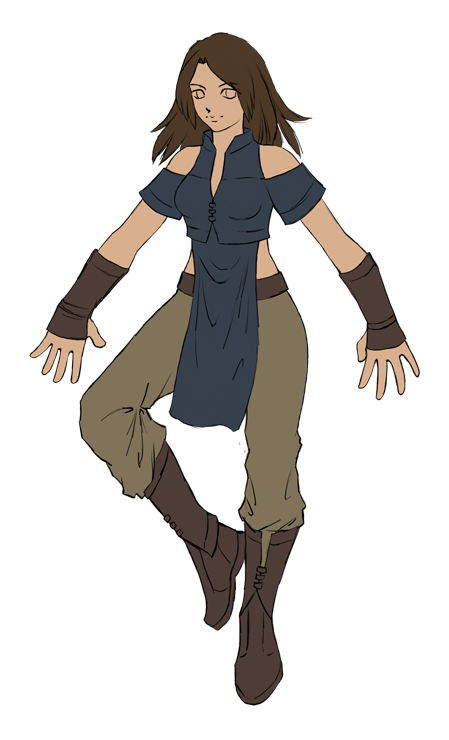
At this stage my layers look like this:
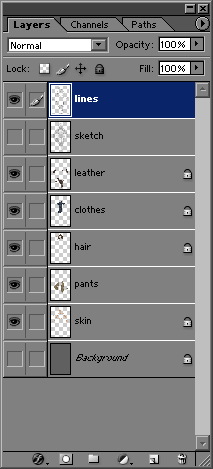 4. Shading
[/b]
Pick some more colours for highlights and shadows and draw them in according to your light source. I used the polygonal lasso tool and paint bucket for this, it makes the process easy and precise. It helps to lock transparency on the layers, and be careful to draw the highlights and shadows on the right layers.
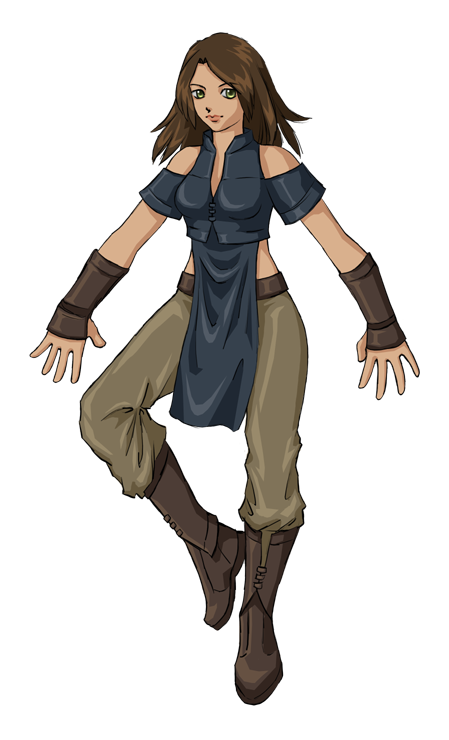 5. Glow
[/b]
Set the hardness of the brush to 0% and make it fairly big (I used 64 and 128 pixel diameters). The blend mode of the brush should be
Color Dodge, opacity should be 100% and the flow about 8-16%.

For each layer of colour, draw in the glow using the highlight colour.
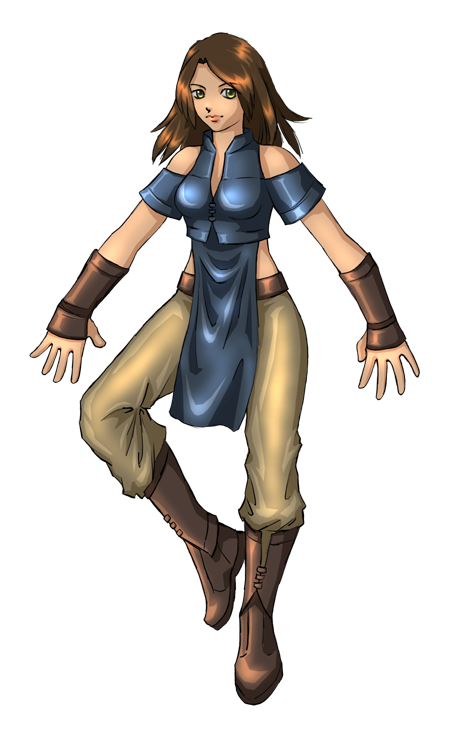 6. Additional Effects
[/b]
I duplicated my lines layer and put a gaussian blur filter on the duplicate to 'soften' the image. Then I merged all the layers except the sketch layer (and backround) and grouped the sketch layer with the merged image with the sketch layer on top. I set the opacity of the sketch to 75% and the blend mode to
Soft Light. This created a nice textured effect. Finally I merged the two layers, deleted the background layer, and resized the image so it would fit on screen.
 Here is the picture at original resolution (2.4mb png file).